Step 3: Configure web application
Now that we’ve deployed a basic web application, the next step is to configure it to provide the required functionality.
Let’s start with a high-level overview of the setup provided within this tutorial. Then, we will go through the specifics of configuring the pre-implemented Bottle application on PythonAnywhere.
Overview
We need the web application to respond to the following requests made by our Unity experiments (also see Notebook 1):
- Establish a connection with the Unity experiment following a GET request
- Assign a unique subject number to each participant (and the encryption key) as part of the GET request
- Receive and store data from the Unity task following a PUT request
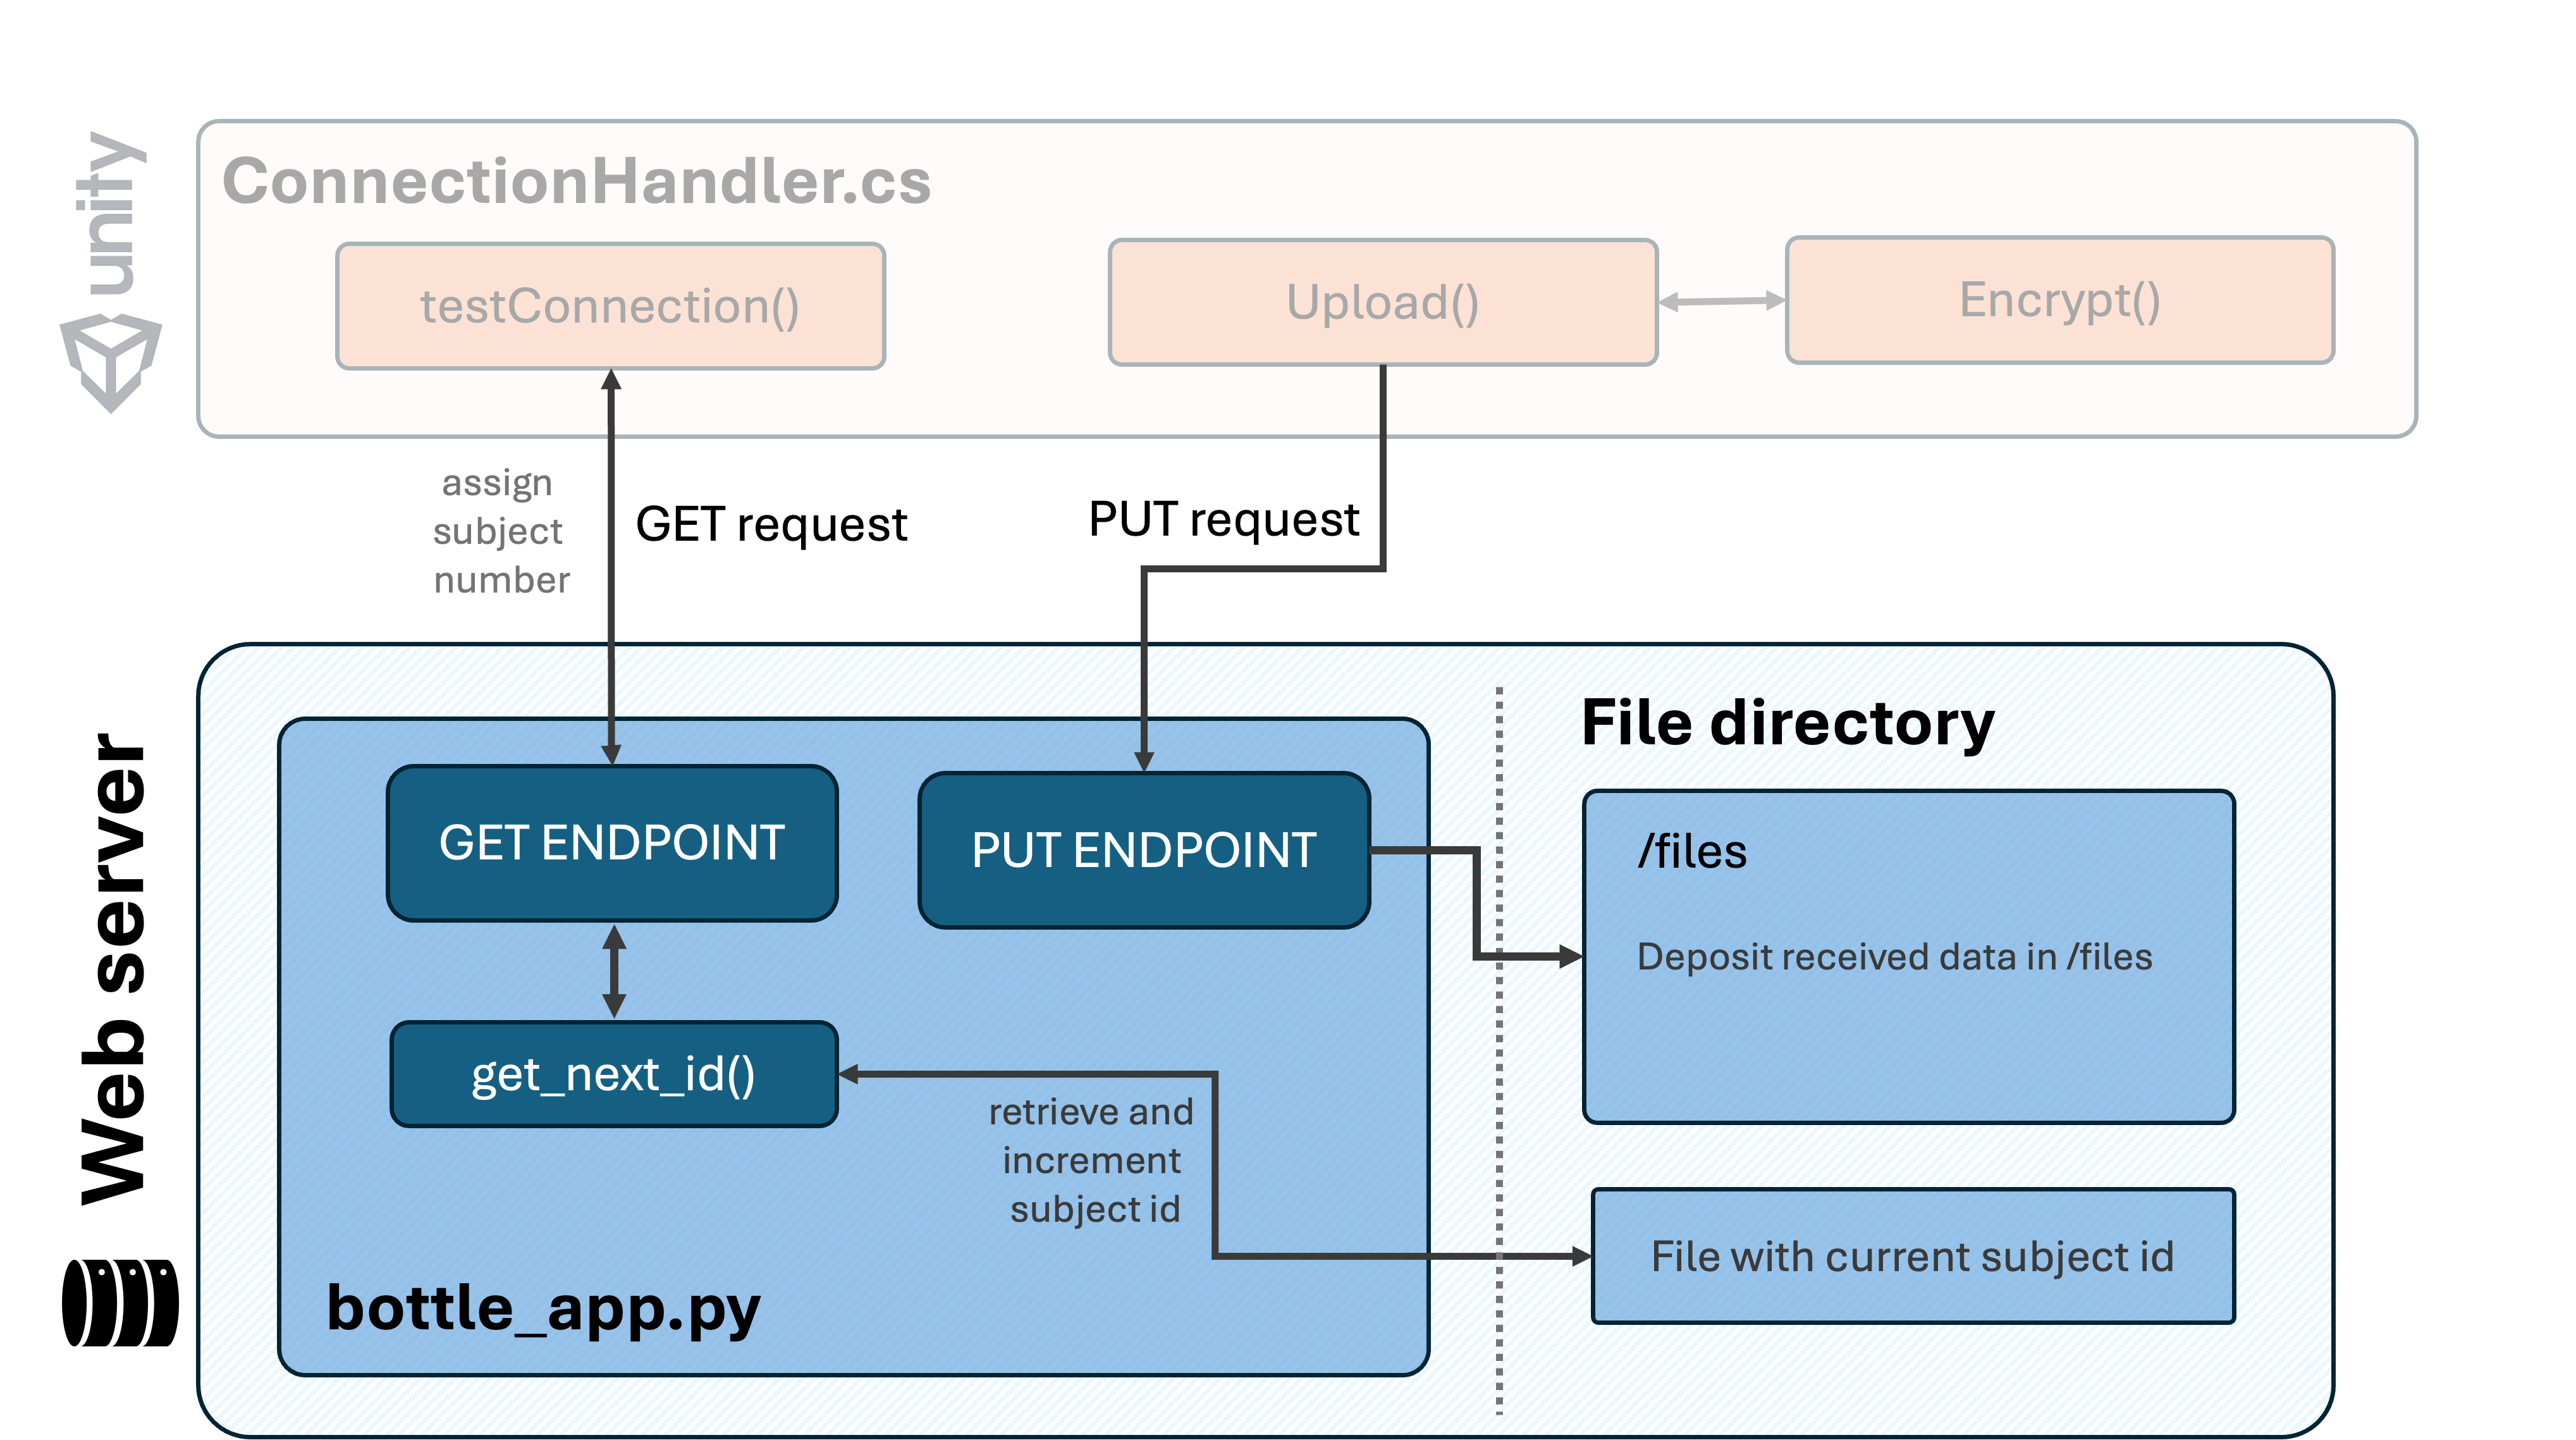
GET endpoint
The GET method is used to retrieve data on a server. In our case, we are using it to retrieve a subject number (and encryption key), as well as a confirmation that the connection is established. To enable this, our Bottle application includes a GET endpoint.
Following a GET request from the testConnection() in our Unity experiment, the web application first retrieves (and increments) a subject number (also see get_next_id() function in bottle_app.py script). Then, this subject number is returned within a response message that is returned to testConnection().
Note that the response message also returns an encryption key. For more information on encryption within the onlineVR-toolbox, see Notebook 3.
# =============================================== #
# # Define a GET endpoint to allocate a unique ID
# =============================================== #
@application.get('/')
def welcome():
    """
    Handles GET requests. Allocates a unique ID and encryption key and returns a response.
    """
    # get updated ID
    allocated_id = get_next_id()

    # return response
    # ensures the allocated_id is displayed as a 6-digit number, padded with leading zeros if necessary.
    response_message = f'{allocated_id:06d} : {encryption_key}'
    return response_message
PUT endpoint
The PUT method is used to create a new resource (e.g., file) on the server with the content included in the request. In our case, we are using it to transfer and store the experiment data.
Following a PUT request from Upload() within our Unity experiment, our web applications first reads the content (i.e., encrypted data) included in the request, extracts the file name (see Step 4) and writes the retrieved data to the specified file path. We will configure this file path in the next step below.
# =============================================== #
# Define a PUT endpoint to receive and store data
# =============================================== #
@application.put('/')
def save_data():
    """
    Handles PUT requests. Extracts a user ID/file name from the request body and saves the
    remaining data into a file named after the user ID.
    """
    content = request.body.read()

    # Extract the filename (assuming UTF-8 encoding)
    filename = content[:filename_length].decode('UTF-8')

    # Define the file path for saving data
    file_path = f'./mysite/files/{filename}.bytes'

    # Write the remaining content to the file
    with open(file_path, 'wb') as file:
        file.write(content[filename_length:])

    return "Upload complete."
Configure on PythonAnywhere
Great, now that we have an overview of the Bottle application, let’s configure it on PythonAnywhere. To set up the Bottle application on PythonAnywhere, we will follow these steps:
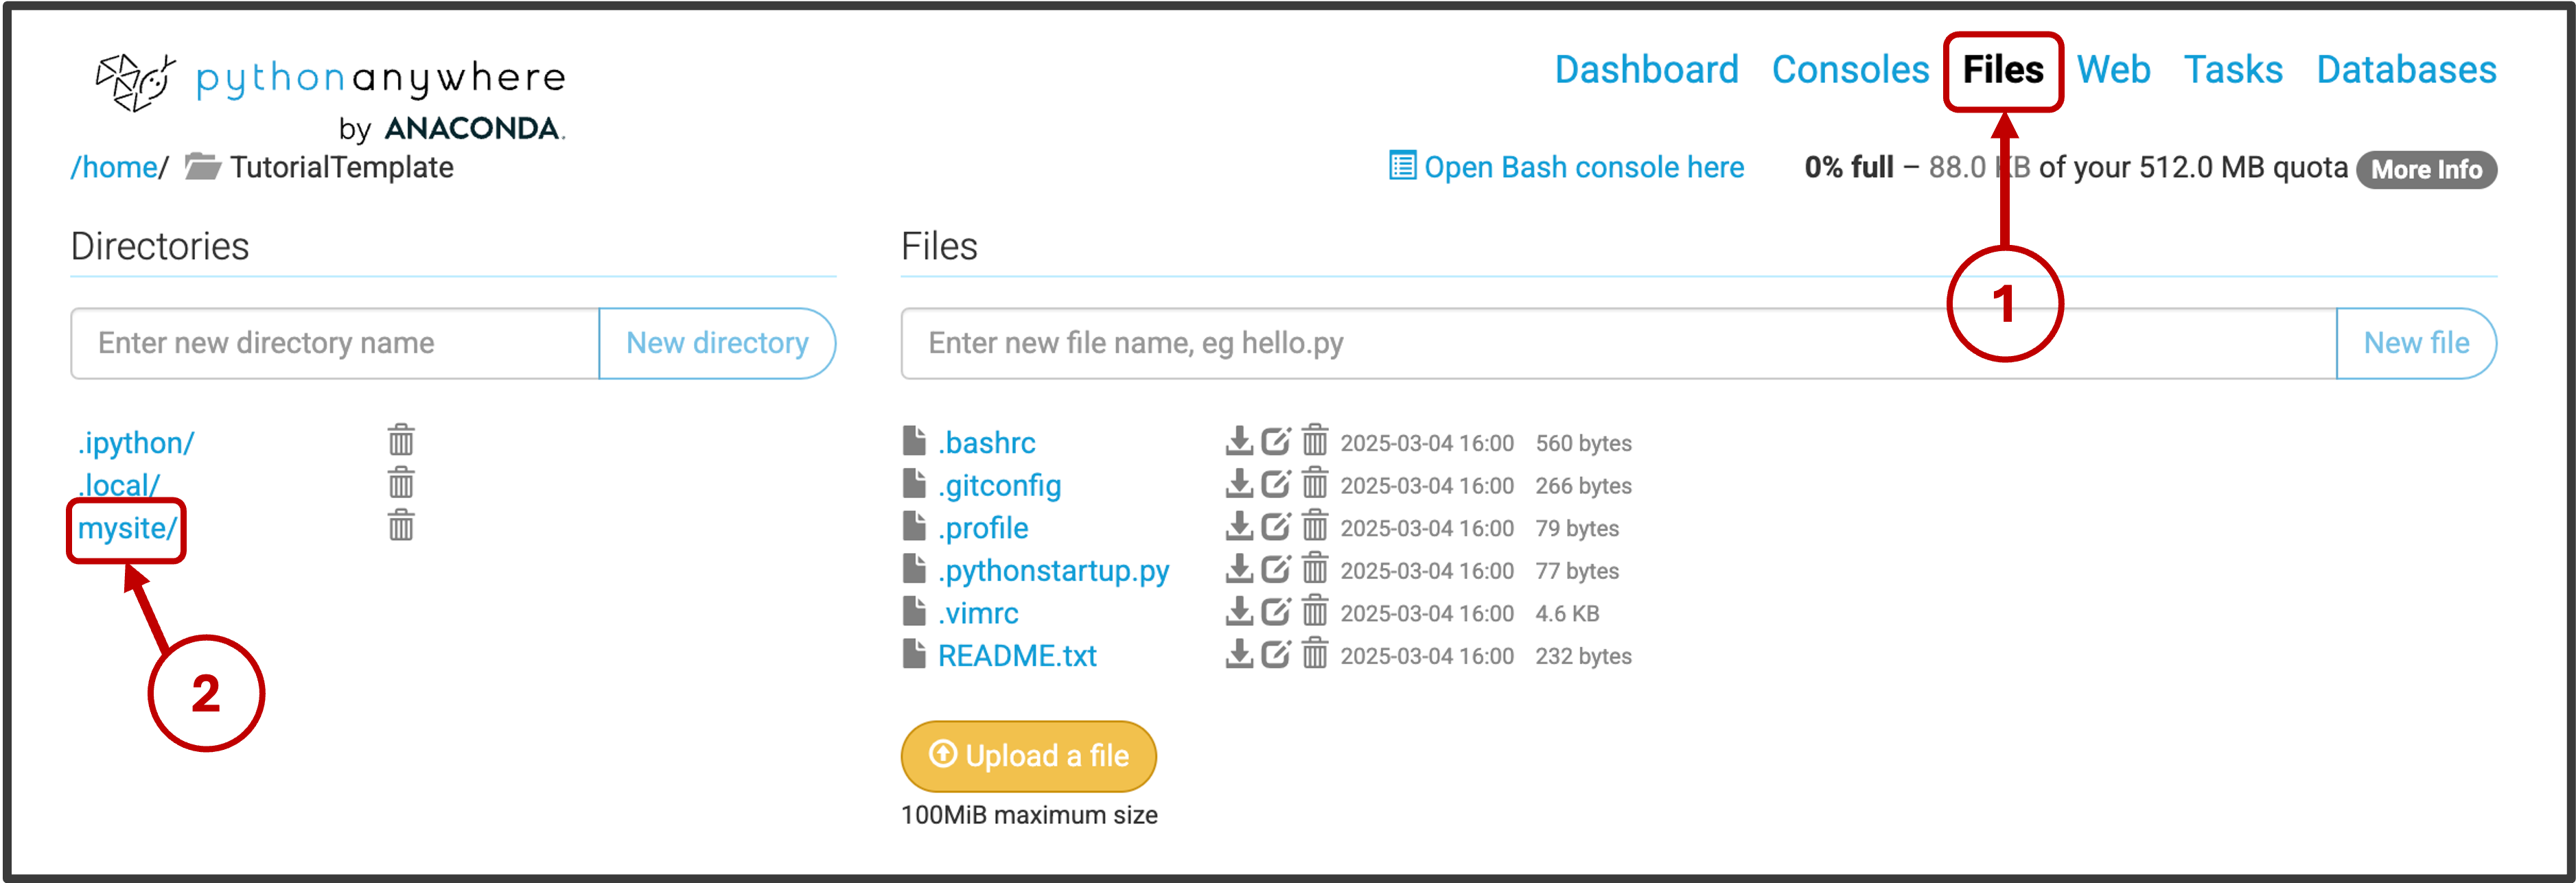
1. Navigate to application files
- Navigate to the “files” tab.
- Within files, navigate to mysite/.
2. Replace the Default Bottle Script
Inside the mysite/ directory:
- Open the existing bottle_app.py file.
- Replace its content with the code from the provided
bottle_app.pyscript. - Save and close the file.
3. Upload Supporting Files and Directories
- Upload the provided id.txt file to the mysite/ directory (using the “Upload a file” button). This file keeps track of assigned subject numbers, allowing the web application to generate unique IDs for each participant.
- Create a new directory named files/ inside mysite/. This is where the web application will store incoming data.
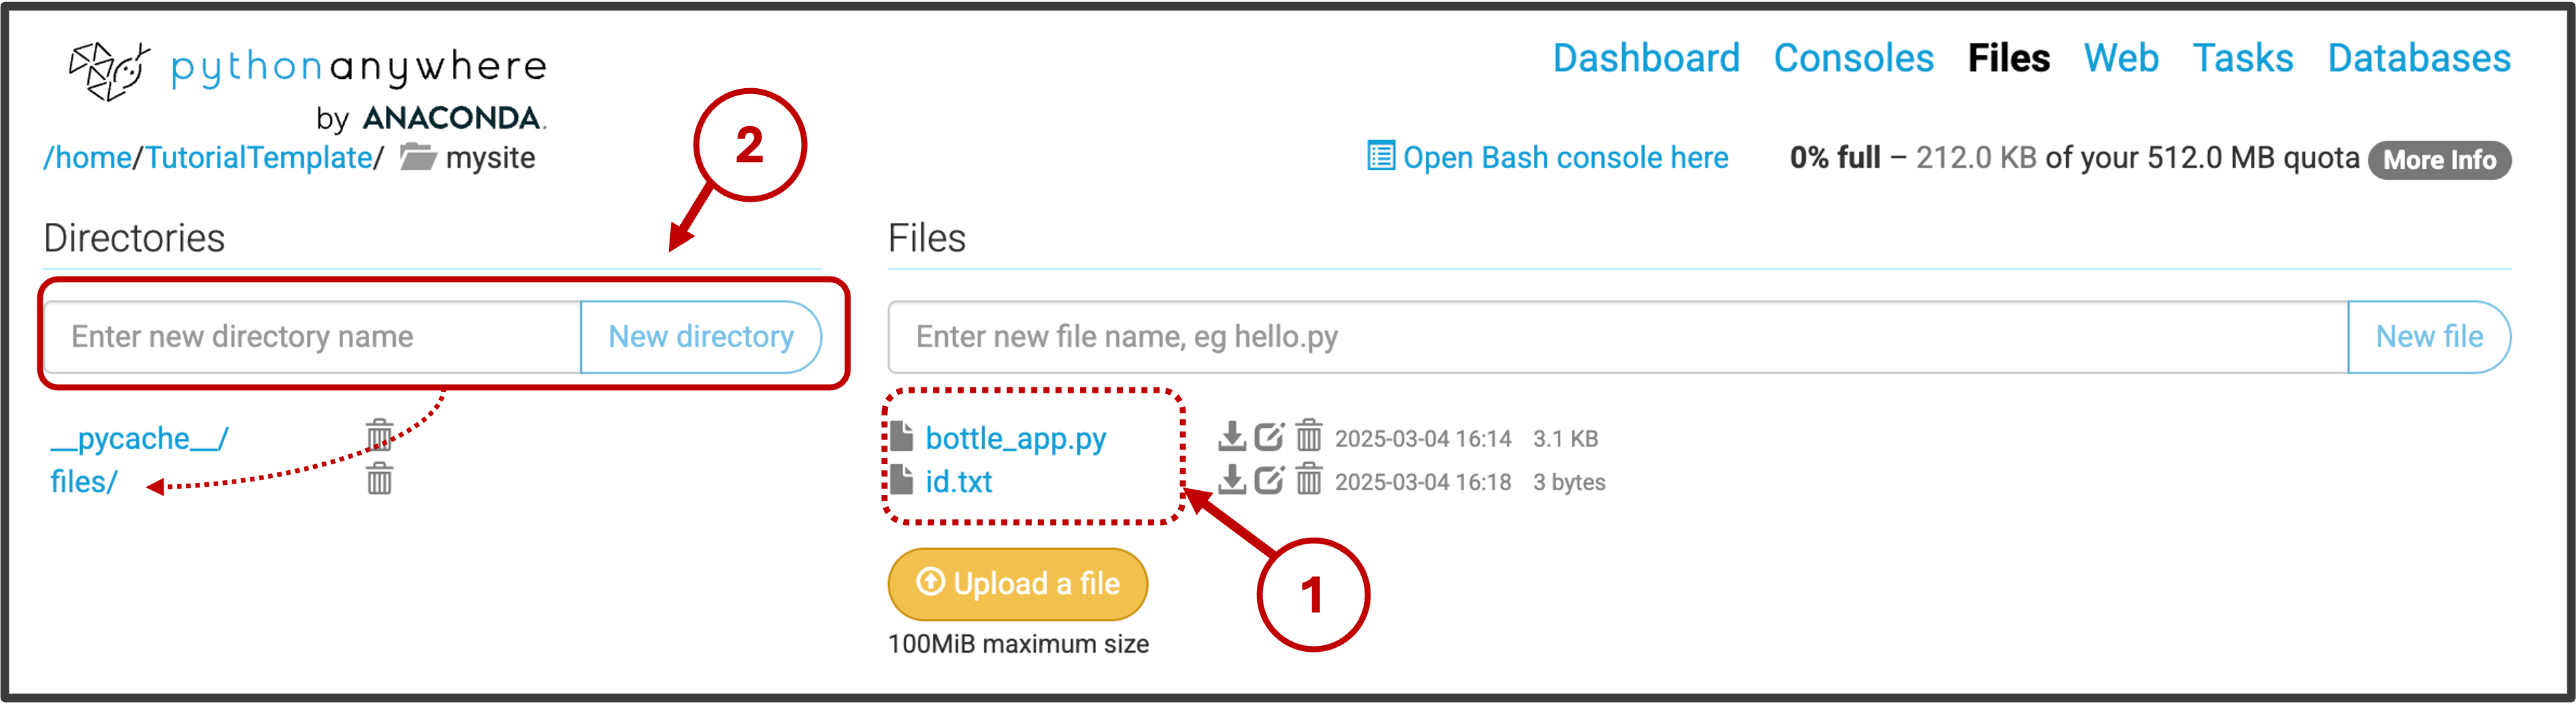
Once complete, the mysite/ directory structure should look like the example above.