Integrating onlineVR-toolbox into your Unity task
Let’s explore how you can integrate this functionality into your own Unity task.
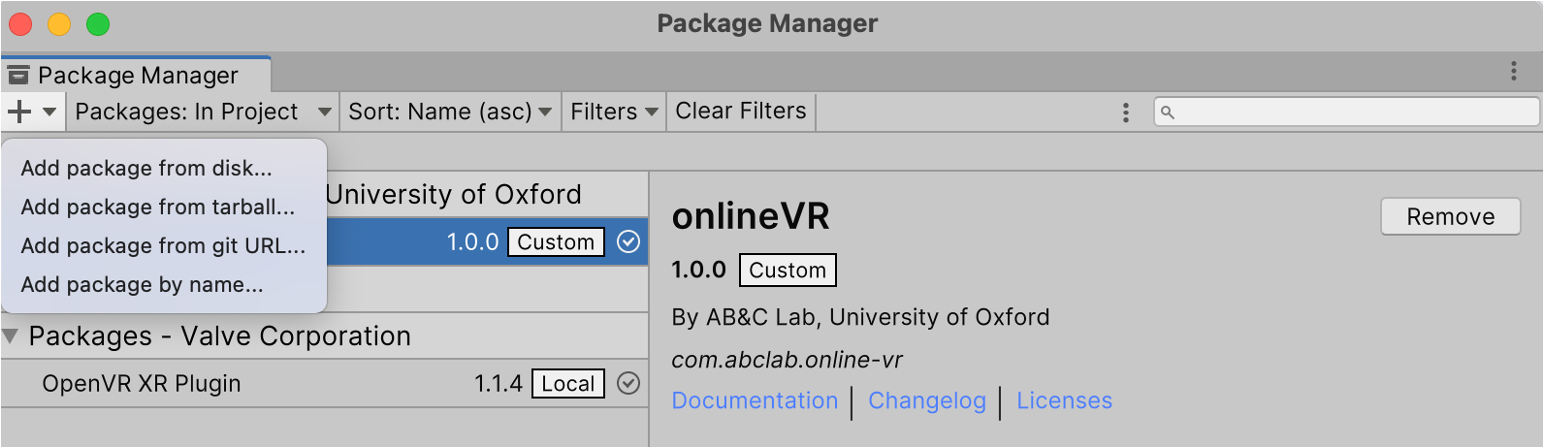
1. Install onlineVR package
- Download the onlineVR-toolbox package from the onlineVR-toolbox GitHub repository.
- Open your Unity project.
- Go to
Package Manager>+>Add package from disk. - Navigate to the downloaded package folder (
onlineVR-toolbox/1_unityPackage/onlineVR) and select thepackage.jsonfile within theonlineVRfolder.
2. Add ConnectionMenu Prefab
- In your Unity project, open the scene where you want to integrate the onlineVR-toolbox functionality.
- In the
Projectwindow, navigate to theonlineVRpackage folder (path in Editor:Packages/onlineVR). - Open the
/Runtimefolder and locate theConnectionMenuprefab. This prefab contains the UI elements for the connection menu and is already set up with the necessary scripts. - Drag and drop the
ConnectionMenuprefab into your scene hierarchy.
3. Integrate into existing experiment logic
To fully integrate the onlineVR-toolbox functionality into your existing Unity task, you need to ensure that the dedicated functions and routines from the ConnectionHandler.cs script is called at the appropriate times in your experiment logic.
This typically involves two main steps: establishing a connection at the start of the experiment and uploading data at the end of the experiment or block. You can use the code provided below or explore the ExperimentHandler.cs script and Step 1 and 2 of this notebook
Establishing connection and retrieving a subject number:
    // important: create access to ConnectionHandler
    public ConectionHandler ConectionHandler; // ensure to drag the ConnectionMenu prefab into this field in the Inspector

    // display connection menu: This notifies participants that the connection is being established
    ConnectionHandler.displayMenu(true);

    // Start the testConnection coroutine and wait for it to complete
    yield return StartCoroutine(ConnectionHandler.testConnection());

    // Check if connection was established successfully
    bool  connectionStatus = ConnectionHandler.connectionCheck();

    if(!connectionStatus){
        // stop coroutine
        Debug.Log("Connection failed. Stopping experiment.");
        yield break;
    }

    // query assigned subject number from connection handler
    SubjectNumber = ConnectionHandler.getSubjectNumber();
Uploading data:
    // create filename and filepath for data file
    fileName = String.Format("onlineVR_{0}_{1}_B{2}",
                            SubjectNumber,
                            DateTime.Now.ToString("yyyy-MM-dd_HH-mm"),
                            block.ToString());
    filePath = Path.Combine(Application.persistentDataPath,  fileName  + ".csv");

    // write data to file (this is a placeholder, you would replace this with your actual data writing logic)
    ConnectionHandler.writeDataToFile(filePath, data);

    // upload data to server
    yield return StartCoroutine(ConnectionHandler.UploadData(filePath));
4. Configure with your web application
To configure the onlineVR package to work with your web application, you need to set the server address in the ConnectionHandler.cs script. We go through this in detail in Notebook 2, where we show how to set up the web application and configure the server address in the Unity project.
5. Some additional notes and tips:
Invariant Culture Setting
We recommend setting the current culture to invariant culture in your Unity project. This ensures that data formatting is consistent across different systems and avoids issues with locale-specific formats (e.g., decimal points, date formats). You can do this by adding the following line of code at the start of your main script (also see ExperimentHandler.cs in the template project):
using System.Globalization;

// make sure that culture is set to invariant (for csv writing)
CultureInfo.CurrentCulture = CultureInfo.InvariantCulture;